.jpg)
Saturday, November 29, 2014

Monday, November 24, 2014
Easy Holiday Art and Crafts Projects
Are you ready yet for the holidays?
Are the children excited? I just love the holiday crafts! I love creating new
crafts and making them. I will be sharing some of my ideas that I have created
here at my home with you and some that I created while teaching. If you miss
any directions, most of these projects can be found in my store on
www.teacherspayteachers.com/store/Gena-Mcwilliams.
Today’s craft is quite simple and
requires very few supplies. I will call it Mosaic Paper Candle Holder.

Supplies needed:
Tissue paper squares (I ordered
mine from Oriental Trading)
Clear gel Elmer’s washable glue (I
bought mine at Walmart)
Clear glass flower pot just right
for a votive candle (I bought mine at Michaels)
1 paint brush (I used a flat soft
watercolor brush)
1 container for glue ( I used a
small clean mason jar)

Directions:
1. Cover your work area. I used a
paper towel.
2. Pour some glue into the
container. Add a bit with some water. Stir the water into the glue to thin the
glue so it won’t tear the tissue paper.
3. Paint the glue on side of the
glass flower pot. Paint a little larger than the tissue paper square.
4. Place a tissue paper square on
the glue. Paint over the square with more glue.
5. Repeat steps #3 and #4 until you
have covered the pot. I left some glass showing on mine and overlapped some
squares to make additional colors.
6. When finished with the tissue
paper, allow to dry.
7. Optional step- if there is any
craft paint available, decorative lines and patterned shapes can be painted on
the tissue paper to embellish the candle holder.
Now you can add an electric votive
candle to the candle holder.
Another idea- I found a glass
Christmas tree candy dish that I may get my grandchildren to decorate with the
tissue paper this holiday! Hmmm! Mizz Mac
Mizz Mac’s Easy Holiday Art
Projects can be found in her store at www.teacherspayteachers.com/store/Gena-Mcwilliams.
Monday, November 10, 2014
Easy Thanksgiving Art project
Thanksgiving- a time to be with family and friends, watch
parades, and football!!
What to do with the children while waiting to eat??
My suggestion is to give them cut up vegetables to print! If
there is a teenager around who could help, that would be even more fun!

The supplies needed:
A variety of cut up vegetables and fruit
9”x12” construction paper (an easy find at dollar stores or
Walmart or Kmart in the kids craft sections)
Crayola kids washable tempera paint and Crayola plastic
smocks (I found mine at Kmart)
1 styrofoam or paper plate
for each color of paint (I used the smaller size)
1 sponge for each paper plate
Directions:
Cover the work area.
Place one sponge on each plate and cover with paint. Sponges
should be soaked in paint to act like an ink pad.
Place one cut up fruit or vegetable on each plate.
Give the children a sheet of paper. Tell the children to
stamp the fruit or vegetable on the sponge first and then on the paper. They
can stamp the fruit or vegetable several times or once to make a pattern.
Have them take turns stamping with each color. The fruit or
vegetables stamping can be overlapped and one on top of the other.

When dry the art work can be embellished with crayons by
coloring in the blank spaces.
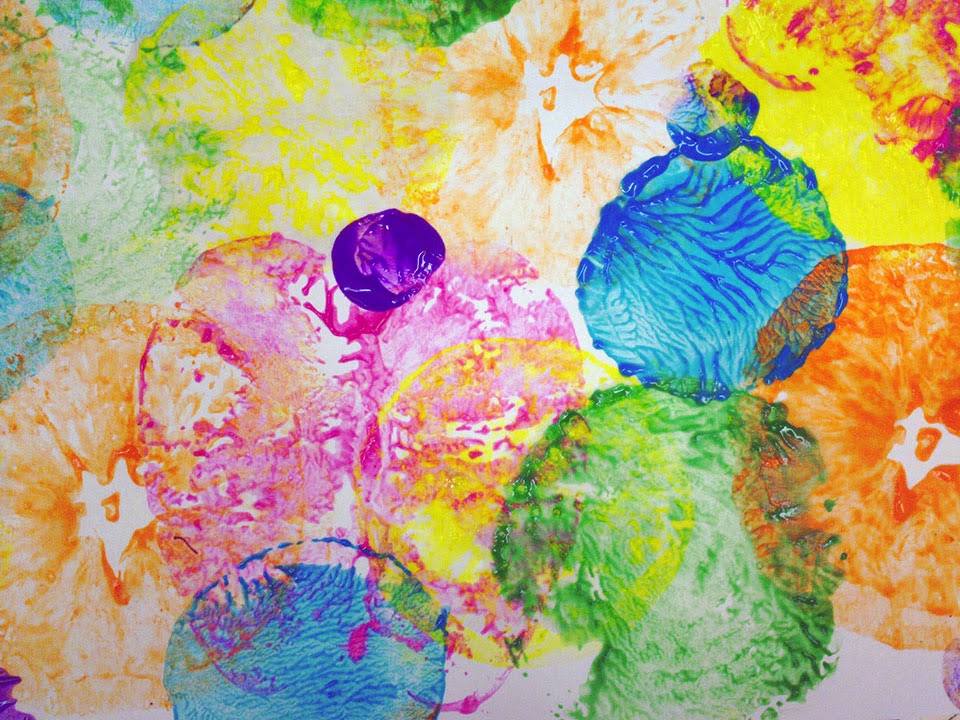
Have a great Thanksgiving with your family! Mizz Mac
Tuesday, October 21, 2014
Easy Jack Olanterns for Halloween

One rainy afternoon last week my grandchildren were at my
house. Since I had planned on making examples for a jack o’lantern art project
for my store on Teachers Pay Teachers, I had art supplies ready to make the art
project.
The supplies are simple Styrofoam balls from Walmart,
Crayola kids paint (washable tempera), and Apply Barrel black craft paint that
I had previously purchased and green chenille stems.
We covered the breakfast room table with newspaper and put
on our paint aprons.
I began by showing them a pumpkin and asking them what
colors do they see and shape is the pumpkin.
Next I gave them their Styrofoam balls which we pounded on
the table to flatten the bottom and the top.
Painting is the next step. They were given a paintbrush each
and shared the orange paint, no water because there was no need to rinse the
brush. Older children could be given yellow and red and orange and a cup of water
for rinsing the brush and a sponge to dry the brush. The ball could be painted
orange with yellow paint spattered on and red painted for shading in the
grooves of the pumpkin.
After the orange paint dried, we looked at jack o’lanterns
to see what shapes to use to paint the face of the jack o’lantern. The children
and I painted our jack o’lantern faces with black paint.
When thoroughly dry, we fold the green chenille stems in
half and twisted them to look like the stems on the pumpkin and inserted the
stems into our jack o’lanterns.
Lots of fun for a rainy afternoon activity!! Mizz Mac
For more easy Halloween art projects, visit my store on www.teacherspayteachers.com/store/Gena-Mcwilliams.
Wednesday, October 8, 2014
Fall/Autumn Leaf Art Project
Fall or autumn is one of the most creative seasons of all! I
just love all the colors- the earth tones and the fall colored leaves. There are plenty of art projects that can be
accomplished just using leaves!
An Easy Leafy art project for home- Leaf Rubbings!
Supplies needed are crayons, leaves with obvious veins
poking out on their underside, paper- thin white copy paper is best. The
crayons can be any color. One year my first graders used Crayola Metallic
Twistables and their rubbings were quite pretty! A teacher can also use the
rubbings to teach fall colors or even how red plus yellow makes orange!
The directions are:
1.
Place the leaf upside down on a flat surface.
2.
Place the white paper on top.
3.
Rub a crayon on its side over the white paper
with one hand. Hold the paper and leaf under the paper in place with the free
hand.
4.
Remove the leaf when finished.
5.
Repeat the above steps, changing leaves and changing
colors of crayons.
Example:

Thursday, September 18, 2014
Three-d shapes in art or How to draw a cube
3-d shapes in art are called form. There are two kinds of
form like there are two kinds of shapes- geometric and natural or organic. The
3-d shapes in Math currently being used by teachers are called geometric
constructed forms, using art terms. Young children, generally, do not visually
perceive 3-d forms. They visually perceive flat shapes. As they grow older they
become more visually attuned to forms. When they can see forms, that’s when art
teachers begin teaching how to create the illusions of 3-d forms. So now how do
we teach the 3-d shapes/forms that Math and geometry standards dictate?
Apparently we can teach how to create geometric forms,
particularly the cube or rectangle. Here are two methods and illustrations.
1.
Draw a square or rectangle on your paper. Draw
another square or rectangle the same size but overlap the first square or
rectangle like a Venn diagram. Connect the corners with lines- upper right to
upper right, upper left to upper left, lower right to lower right, and lower
left to lower left. Erase inside lines.
2.
The second way is to draw a horizontal line
somewhere on your paper. Draw a square or a rectangle under the horizontal
line. Draw a point or a dot on the horizontal line. Draw 3 diagonal lines from
the dot on the horizontal line to 3 corners of the square or rectangle. Draw a
horizontal line above the top of the rectangle/square between the top two
diagonal lines. Draw a vertical line from the end of the previously drawn
horizontal line down to the bottom diagonal line. Erase the diagonals between
the dot and the 3-d shape.
3.
Illustrations of both methods:

Young children love drawing the cubes but when they draw
from their imagination, they will still draw houses etc. with flat shapes. In
time they will want to draw the other side of a house or will want to know how
to make something look 3-d. Mizz Mac
More of Mizz Mac’s lessons can be found in her store at
www.teacherspayteachers.com/store/Gena-Mcwilliams.
Monday, September 8, 2014
All About Shapes Art
Have your children talked about shapes this week? My
grandchildren have. When I picked them up from school on Friday, my grandson
(kindergarten age) started a game. He would give us checks if we could find
geometric shapes. Challenge on! His
little sister and I found circle tires, square and rectangle signs and windows,
and circle wreaths and signs on doors all the way home. The hardest shape to
find was the triangle. I finally found some on top of the square tower at
Vineville Baptist church. That was quite a fun way to reinforce his learning.
Another way to reinforce is through art. Art has two flat
shapes-geometric and natural. 3-d shapes are called form. The sphere, cylinder,
and cubes are drawn illusions of 3-d but that’s getting too technical. Try my shapes
projects when using art to reinforce identifying shapes. Here is the link to my
All about Shapes project: http://www.teacherspayteachers.com/Product/Mizz-Macs-All-About-Shapes-871403.

I like to use Edward Hopper’s paintings as
examples of how artists use shapes in their artwork. Here’s a link to his
“Seven A.M.” painting: http://www.edwardhopper.net/seven-am.jsp.
Creating art by first practicing line making and shape
making takes away any drawing fears.
Mizz Mac
Mizz Mac’s art projects can be found in her store on www.teacherspayteachers.com/Store/Gena-Mcwilliams.
Subscribe to:
Posts (Atom)