Tuesday, January 6, 2015

Cool Snowflakes for Inside Fun!

Good morning! Did you have happy holidays? I know mine was hectic. The weather here is about to turn cold and frightful. Remember the ice storms last year and the frozen pipes?

So what to do with the children when they are stuck inside for days at a time? It’s time for art!!
There is a cool children’s book about the man who photographed snowflakes, “Snowflake Bentley”. Google Snowflake Bentley and you can find out about the museum in his name in Maine, the camera he invented to photograph the snowflakes, and see the actual photographs he made.

Now if you want to cut out paper snowflakes, you can follow these directions or you can buy my product: (it’s only $1.50 and you can download it and have the directions readily available) http://www.teacherspayteachers.com/Product/Snowflakes-and-Symmetry-1007433.

Supplies needed:

 1 round lid any size  to fit paper– I collected various sizes of plastic lids
                                 1 pencil
                                 Several sheets of white copy paper
                                  1 pair of scissors
Directions:
1.       Place the lid on the paper and trace around the lid with the pencil.

2.       Cut the circle out.

3.       Fold the circle in half, taco shape.
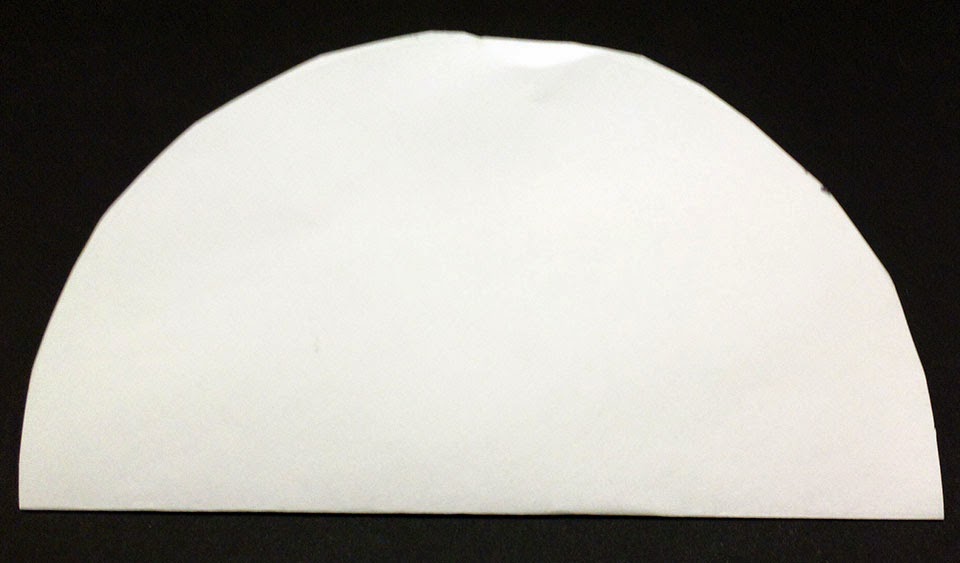
4.       Fold in half again, pie shape.

5.       Fold a third time, pizza shape.

6.       Cut out triangles and half circles on the sides. Don’t cut the point if you are a beginner.

7.       Unfold to see the snowflake.

8.       After much practice, deeper cuts can be made on the curved side to create radial arms and the point can be cut to make a hole in the center of the flake.


Stay warm and have fun! Cutting snowflakes is fun but messy! Mizz Mac

Monday, December 8, 2014

An Easy Holiday Craft

Are you through decorating your house for Christmas or are you like me and wait until a little closer to Christmas? My waiting all started when my son was born 30 years ago in December after the Georgia-Auburn game. (Molly was born after the Georgia- Florida game when Herschel was playing.) I decided not to let Christmas come before his birthday. Our family tradition eventually became going out to the tree farm, picking out a huge Leyland cypress (10’-12’), cutting it down and bringing it home. One year my husband decided to hang the tree (not upside down, Gary Ross) from the ceiling and wired a connection so we wouldn’t have any wires on the floor. We have been hanging our trees ever since.

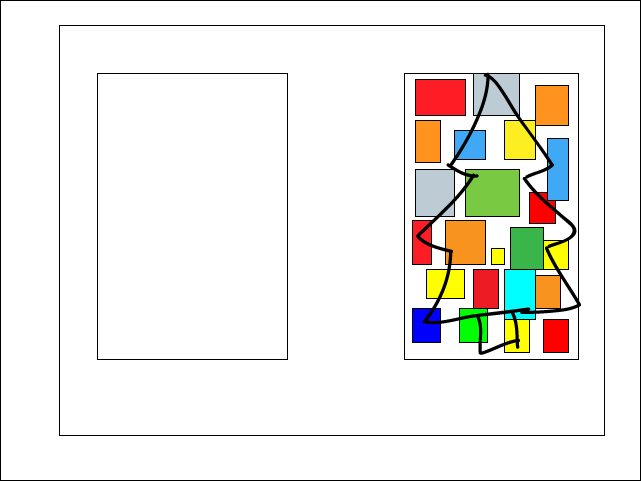
My decorations aren’t out yet. The grandchildren will be here for one weekend soon. They are already bonkers! My art project with them will be gluing tissue paper squares on wax paper, letting them dry ( or use a hair dryer if they’re impatient), then drawing a Christmas tree shape on the wax paper with a Sharpie, cutting it out, and taping the tree on the windows.

Here are the supplies, directions, and illustrations:
Supplies needed:
Tissue paper squares (I bought mine from Oriental Trading)
Elmer’s Washable clear glue (I bought mine at Walmart but have seen another brand at the dollar store on Forsyth)
1 black Sharpie ( Walmart or Dollar Store)
Wax paper
1 container for glue
1 container for water to have a dot or two of liquid dish detergent added
1 paint brush per child


Cover your work area. Lay out the sheet of wax paper. Put some water in the water container and add a little dish detergent to it. Stir to mix. Pour some glue into the glue container; add some soapy water, and mix to make the glue easy to brush. Brush the glue on the wax paper in random sections. Place the tissue paper squares on the glue. Glue on top of the squares if they are not sticking well. Allow to dry.
When dry, turn the wax paper over. Draw Christmas trees with the sharpie. Cut out. Tape the trees with clear tape on your windows.


I hope you will have as much fun with this art project as I plan on having with my grandchildren!
I have a fun beading free product that’s being downloaded a lot from my store on teacherpayteachers:

Thank you again! Mizz Mac

Monday, November 24, 2014

Easy Holiday Art and Crafts Projects

Are you ready yet for the holidays? Are the children excited? I just love the holiday crafts! I love creating new crafts and making them. I will be sharing some of my ideas that I have created here at my home with you and some that I created while teaching. If you miss any directions, most of these projects can be found in my store on www.teacherspayteachers.com/store/Gena-Mcwilliams.
Today’s craft is quite simple and requires very few supplies. I will call it Mosaic Paper Candle Holder.

Supplies needed:
Tissue paper squares (I ordered mine from Oriental Trading)
Clear gel Elmer’s washable glue (I bought mine at Walmart)
Clear glass flower pot just right for a votive candle (I bought mine at Michaels)
1 paint brush (I used a flat soft watercolor brush)
1 container for glue ( I used a small clean mason jar)

Directions:
1. Cover your work area. I used a paper towel.
2. Pour some glue into the container. Add a bit with some water. Stir the water into the glue to thin the glue so it won’t tear the tissue paper.
3. Paint the glue on side of the glass flower pot. Paint a little larger than the tissue paper square.
4. Place a tissue paper square on the glue. Paint over the square with more glue.
5. Repeat steps #3 and #4 until you have covered the pot. I left some glass showing on mine and overlapped some squares to make additional colors.
6. When finished with the tissue paper, allow to dry.
7. Optional step- if there is any craft paint available, decorative lines and patterned shapes can be painted on the tissue paper to embellish the candle holder.
Now you can add an electric votive candle to the candle holder.

Another idea- I found a glass Christmas tree candy dish that I may get my grandchildren to decorate with the tissue paper this holiday! Hmmm! Mizz Mac

Mizz Mac’s Easy Holiday Art Projects can be found in her store at www.teacherspayteachers.com/store/Gena-Mcwilliams.


Monday, November 10, 2014

Easy Thanksgiving Art project

Thanksgiving- a time to be with family and friends, watch parades, and football!!
What to do with the children while waiting to eat??
My suggestion is to give them cut up vegetables to print! If there is a teenager around who could help, that would be even more fun!

The supplies needed:
A variety of cut up vegetables and fruit
9”x12” construction paper (an easy find at dollar stores or Walmart or Kmart in the kids craft sections)
Crayola kids washable tempera paint and Crayola plastic smocks (I found mine at Kmart)
1 styrofoam  or paper plate for each color of paint (I used the smaller size)
1 sponge for each paper plate
Directions:
Cover the work area.
Place one sponge on each plate and cover with paint. Sponges should be soaked in paint to act like an ink pad.
Place one cut up fruit or vegetable on each plate.
Give the children a sheet of paper. Tell the children to stamp the fruit or vegetable on the sponge first and then on the paper. They can stamp the fruit or vegetable several times or once to make a pattern.
Have them take turns stamping with each color. The fruit or vegetables stamping can be overlapped and one on top of the other.

When dry the art work can be embellished with crayons by coloring in the blank spaces.


Have a great Thanksgiving with your family! Mizz Mac

Tuesday, October 21, 2014

Easy Jack Olanterns for Halloween


One rainy afternoon last week my grandchildren were at my house. Since I had planned on making examples for a jack o’lantern art project for my store on Teachers Pay Teachers, I had art supplies ready to make the art project.
The supplies are simple Styrofoam balls from Walmart, Crayola kids paint (washable tempera), and Apply Barrel black craft paint that I had previously purchased and green chenille stems.
We covered the breakfast room table with newspaper and put on our paint aprons.
I began by showing them a pumpkin and asking them what colors do they see and shape is the pumpkin.
Next I gave them their Styrofoam balls which we pounded on the table to flatten the bottom and the top.
Painting is the next step. They were given a paintbrush each and shared the orange paint, no water because there was no need to rinse the brush. Older children could be given yellow and red and orange and a cup of water for rinsing the brush and a sponge to dry the brush. The ball could be painted orange with yellow paint spattered on and red painted for shading in the grooves of the pumpkin.
After the orange paint dried, we looked at jack o’lanterns to see what shapes to use to paint the face of the jack o’lantern. The children and I painted our jack o’lantern faces with black paint.
When thoroughly dry, we fold the green chenille stems in half and twisted them to look like the stems on the pumpkin and inserted the stems into our jack o’lanterns.
Lots of fun for a rainy afternoon activity!! Mizz Mac

For more easy Halloween art projects, visit my store on www.teacherspayteachers.com/store/Gena-Mcwilliams.

Wednesday, October 8, 2014

Fall/Autumn Leaf Art Project

Fall or autumn is one of the most creative seasons of all! I just love all the colors- the earth tones and the fall colored leaves.  There are plenty of art projects that can be accomplished just using leaves!
An Easy Leafy art project for home- Leaf Rubbings!
Supplies needed are crayons, leaves with obvious veins poking out on their underside, paper- thin white copy paper is best. The crayons can be any color. One year my first graders used Crayola Metallic Twistables and their rubbings were quite pretty! A teacher can also use the rubbings to teach fall colors or even how red plus yellow makes orange!
The directions are:
1.       Place the leaf upside down on a flat surface.
2.       Place the white paper on top.
3.       Rub a crayon on its side over the white paper with one hand. Hold the paper and leaf under the paper in place with the free hand.
4.       Remove the leaf when finished.
5.       Repeat the above steps, changing leaves and changing colors of crayons.

Example: