Monday, December 8, 2014

An Easy Holiday Craft

Are you through decorating your house for Christmas or are you like me and wait until a little closer to Christmas? My waiting all started when my son was born 30 years ago in December after the Georgia-Auburn game. (Molly was born after the Georgia- Florida game when Herschel was playing.) I decided not to let Christmas come before his birthday. Our family tradition eventually became going out to the tree farm, picking out a huge Leyland cypress (10’-12’), cutting it down and bringing it home. One year my husband decided to hang the tree (not upside down, Gary Ross) from the ceiling and wired a connection so we wouldn’t have any wires on the floor. We have been hanging our trees ever since.

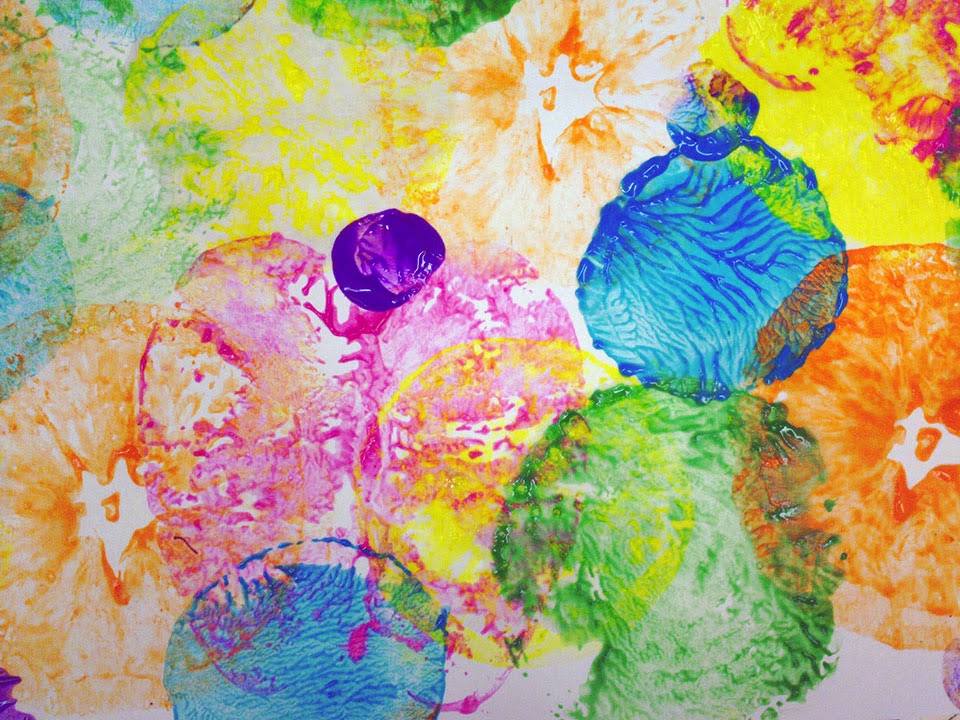
My decorations aren’t out yet. The grandchildren will be here for one weekend soon. They are already bonkers! My art project with them will be gluing tissue paper squares on wax paper, letting them dry ( or use a hair dryer if they’re impatient), then drawing a Christmas tree shape on the wax paper with a Sharpie, cutting it out, and taping the tree on the windows.

Here are the supplies, directions, and illustrations:
Supplies needed:
Tissue paper squares (I bought mine from Oriental Trading)
Elmer’s Washable clear glue (I bought mine at Walmart but have seen another brand at the dollar store on Forsyth)
1 black Sharpie ( Walmart or Dollar Store)
Wax paper
1 container for glue
1 container for water to have a dot or two of liquid dish detergent added
1 paint brush per child


Cover your work area. Lay out the sheet of wax paper. Put some water in the water container and add a little dish detergent to it. Stir to mix. Pour some glue into the glue container; add some soapy water, and mix to make the glue easy to brush. Brush the glue on the wax paper in random sections. Place the tissue paper squares on the glue. Glue on top of the squares if they are not sticking well. Allow to dry.
When dry, turn the wax paper over. Draw Christmas trees with the sharpie. Cut out. Tape the trees with clear tape on your windows.


I hope you will have as much fun with this art project as I plan on having with my grandchildren!
I have a fun beading free product that’s being downloaded a lot from my store on teacherpayteachers:

Thank you again! Mizz Mac

Monday, November 24, 2014

Easy Holiday Art and Crafts Projects

Are you ready yet for the holidays? Are the children excited? I just love the holiday crafts! I love creating new crafts and making them. I will be sharing some of my ideas that I have created here at my home with you and some that I created while teaching. If you miss any directions, most of these projects can be found in my store on www.teacherspayteachers.com/store/Gena-Mcwilliams.
Today’s craft is quite simple and requires very few supplies. I will call it Mosaic Paper Candle Holder.

Supplies needed:
Tissue paper squares (I ordered mine from Oriental Trading)
Clear gel Elmer’s washable glue (I bought mine at Walmart)
Clear glass flower pot just right for a votive candle (I bought mine at Michaels)
1 paint brush (I used a flat soft watercolor brush)
1 container for glue ( I used a small clean mason jar)

Directions:
1. Cover your work area. I used a paper towel.
2. Pour some glue into the container. Add a bit with some water. Stir the water into the glue to thin the glue so it won’t tear the tissue paper.
3. Paint the glue on side of the glass flower pot. Paint a little larger than the tissue paper square.
4. Place a tissue paper square on the glue. Paint over the square with more glue.
5. Repeat steps #3 and #4 until you have covered the pot. I left some glass showing on mine and overlapped some squares to make additional colors.
6. When finished with the tissue paper, allow to dry.
7. Optional step- if there is any craft paint available, decorative lines and patterned shapes can be painted on the tissue paper to embellish the candle holder.
Now you can add an electric votive candle to the candle holder.

Another idea- I found a glass Christmas tree candy dish that I may get my grandchildren to decorate with the tissue paper this holiday! Hmmm! Mizz Mac

Mizz Mac’s Easy Holiday Art Projects can be found in her store at www.teacherspayteachers.com/store/Gena-Mcwilliams.


Monday, November 10, 2014

Easy Thanksgiving Art project

Thanksgiving- a time to be with family and friends, watch parades, and football!!
What to do with the children while waiting to eat??
My suggestion is to give them cut up vegetables to print! If there is a teenager around who could help, that would be even more fun!

The supplies needed:
A variety of cut up vegetables and fruit
9”x12” construction paper (an easy find at dollar stores or Walmart or Kmart in the kids craft sections)
Crayola kids washable tempera paint and Crayola plastic smocks (I found mine at Kmart)
1 styrofoam  or paper plate for each color of paint (I used the smaller size)
1 sponge for each paper plate
Directions:
Cover the work area.
Place one sponge on each plate and cover with paint. Sponges should be soaked in paint to act like an ink pad.
Place one cut up fruit or vegetable on each plate.
Give the children a sheet of paper. Tell the children to stamp the fruit or vegetable on the sponge first and then on the paper. They can stamp the fruit or vegetable several times or once to make a pattern.
Have them take turns stamping with each color. The fruit or vegetables stamping can be overlapped and one on top of the other.

When dry the art work can be embellished with crayons by coloring in the blank spaces.


Have a great Thanksgiving with your family! Mizz Mac

Tuesday, October 21, 2014

Easy Jack Olanterns for Halloween


One rainy afternoon last week my grandchildren were at my house. Since I had planned on making examples for a jack o’lantern art project for my store on Teachers Pay Teachers, I had art supplies ready to make the art project.
The supplies are simple Styrofoam balls from Walmart, Crayola kids paint (washable tempera), and Apply Barrel black craft paint that I had previously purchased and green chenille stems.
We covered the breakfast room table with newspaper and put on our paint aprons.
I began by showing them a pumpkin and asking them what colors do they see and shape is the pumpkin.
Next I gave them their Styrofoam balls which we pounded on the table to flatten the bottom and the top.
Painting is the next step. They were given a paintbrush each and shared the orange paint, no water because there was no need to rinse the brush. Older children could be given yellow and red and orange and a cup of water for rinsing the brush and a sponge to dry the brush. The ball could be painted orange with yellow paint spattered on and red painted for shading in the grooves of the pumpkin.
After the orange paint dried, we looked at jack o’lanterns to see what shapes to use to paint the face of the jack o’lantern. The children and I painted our jack o’lantern faces with black paint.
When thoroughly dry, we fold the green chenille stems in half and twisted them to look like the stems on the pumpkin and inserted the stems into our jack o’lanterns.
Lots of fun for a rainy afternoon activity!! Mizz Mac

For more easy Halloween art projects, visit my store on www.teacherspayteachers.com/store/Gena-Mcwilliams.

Wednesday, October 8, 2014

Fall/Autumn Leaf Art Project

Fall or autumn is one of the most creative seasons of all! I just love all the colors- the earth tones and the fall colored leaves.  There are plenty of art projects that can be accomplished just using leaves!
An Easy Leafy art project for home- Leaf Rubbings!
Supplies needed are crayons, leaves with obvious veins poking out on their underside, paper- thin white copy paper is best. The crayons can be any color. One year my first graders used Crayola Metallic Twistables and their rubbings were quite pretty! A teacher can also use the rubbings to teach fall colors or even how red plus yellow makes orange!
The directions are:
1.       Place the leaf upside down on a flat surface.
2.       Place the white paper on top.
3.       Rub a crayon on its side over the white paper with one hand. Hold the paper and leaf under the paper in place with the free hand.
4.       Remove the leaf when finished.
5.       Repeat the above steps, changing leaves and changing colors of crayons.

Example:


Thursday, September 18, 2014

Three-d shapes in art or How to draw a cube

3-d shapes in art are called form. There are two kinds of form like there are two kinds of shapes- geometric and natural or organic. The 3-d shapes in Math currently being used by teachers are called geometric constructed forms, using art terms. Young children, generally, do not visually perceive 3-d forms. They visually perceive flat shapes. As they grow older they become more visually attuned to forms. When they can see forms, that’s when art teachers begin teaching how to create the illusions of 3-d forms. So now how do we teach the 3-d shapes/forms that Math and geometry standards dictate?
Apparently we can teach how to create geometric forms, particularly the cube or rectangle. Here are two methods and illustrations.
1.       Draw a square or rectangle on your paper. Draw another square or rectangle the same size but overlap the first square or rectangle like a Venn diagram. Connect the corners with lines- upper right to upper right, upper left to upper left, lower right to lower right, and lower left to lower left. Erase inside lines.
2.       The second way is to draw a horizontal line somewhere on your paper. Draw a square or a rectangle under the horizontal line. Draw a point or a dot on the horizontal line. Draw 3 diagonal lines from the dot on the horizontal line to 3 corners of the square or rectangle. Draw a horizontal line above the top of the rectangle/square between the top two diagonal lines. Draw a vertical line from the end of the previously drawn horizontal line down to the bottom diagonal line. Erase the diagonals between the dot and the 3-d shape.
3.       Illustrations of both methods:


Young children love drawing the cubes but when they draw from their imagination, they will still draw houses etc. with flat shapes. In time they will want to draw the other side of a house or will want to know how to make something look 3-d.  Mizz Mac

More of Mizz Mac’s lessons can be found in her store at www.teacherspayteachers.com/store/Gena-Mcwilliams.

Monday, September 8, 2014

All About Shapes Art

Have your children talked about shapes this week? My grandchildren have. When I picked them up from school on Friday, my grandson (kindergarten age) started a game. He would give us checks if we could find geometric shapes.  Challenge on! His little sister and I found circle tires, square and rectangle signs and windows, and circle wreaths and signs on doors all the way home. The hardest shape to find was the triangle. I finally found some on top of the square tower at Vineville Baptist church. That was quite a fun way to reinforce his learning.
Another way to reinforce is through art. Art has two flat shapes-geometric and natural. 3-d shapes are called form. The sphere, cylinder, and cubes are drawn illusions of 3-d but that’s getting too technical. Try my shapes projects when using art to reinforce identifying shapes. Here is the link to my All about Shapes project: http://www.teacherspayteachers.com/Product/Mizz-Macs-All-About-Shapes-871403


  I like to use Edward Hopper’s paintings as examples of how artists use shapes in their artwork. Here’s a link to his “Seven A.M.” painting: http://www.edwardhopper.net/seven-am.jsp.
Creating art by first practicing line making and shape making takes away any drawing fears.  Mizz Mac
Mizz Mac’s art projects can be found in her store on www.teacherspayteachers.com/Store/Gena-Mcwilliams.


Wednesday, August 27, 2014

Print an Apple for Johnny Appleseed!

How many of you are familiar with the tale of Johnny Appleseed? I can't say I am extremely familiar but know that this time of the year many school children are learning about Johnny Appleseed and apples. Apples are in season in the Fall. One of my favorite childhood desserts was a  baked apple sprinkled with cinnamon and a dollop of vanilla ice cream on top.
The Apple for art teachers is a unique shape. It is really a natural shape but if we are to draw an apple, we first break it down into a cube! Weird!
Today's lesson is a fun one and not that complicated. Here is your supply list:
½ an apple per student or group of four
1 soft round watercolor brush per apple half
1 container of red tempera paint
1 6”x 4 ½” white drawing or construction paper

Objective- Create artwork emphasizing one or more elements of art

Introduction
Read books about Johnny Appleseed. There are plenty of Google Images of the legendary figure.
There are two kinds of shapes in art, the geometric ones (squares, rectangles, circles, etc.) and the natural ones. The Apple is a natural shape.

Directions:

 Pick up the apple half and paint the meat side with red paint. If the apple has been freshly cut, blot it on a paper towel to dry some of its juices.

Stamp the painted apple half on the white paper.

Add painted thumb print stampings around the apple print.

Use markers to draw a stem and a leaf.

The apple print is a fun and visually successful lesson. The printed paper can be mounted on construction paper or decorative paper or both for a quick display of art.  It can also be a nice craft but use acrylic paint instead of tempera paint. The acrylic stampings can be applied to kitchen towels, napkins, or even paper decoupage on a tray for those hard-to-buy grandparent gifts or room mother gifts. Have Fun! Mizz Mac

Sunday, August 17, 2014

Art supplies, sales, and Teachers pay Teachers

Are you back in school? My grandchildren have been back in school since August 1. I read online that most schools in the U.S. are on an August-May calendar. I am torn between this calendar and an old one when school started a few days before Labor Day, had two days off for thanksgiving, two weeks for Christmas/Winter break, and a week for Spring Break. School was out at the end of May. It is my opinion that children learn better if they are in a routine without a lot of distractions and breaks.
So have you been to Ollies yet? I had to go check out the art supplies. I didn’t find much but there were plenty of canvases and one rack area with a few Crayola name brand dry erase crayons and markers, some off brand art supplies, and plenty of coloring books! I’m still looking for the best way to store my grandchildren’s art supplies. By the way if you use Crayola Playdough and it gets dropped on the carpet, let it dry out a bit and it will vacuum right on up!
We now have several places to shop for children’s art supplies but for professionals, look on the internet. I buy from Dick Blick because there is a distribution center in Atlanta and two stores in Savannah and an easy website. If Dick Blick doesn’t have what I need, then Amazon does! Several artists I know use Cheap Joe’s website.
There are my hints and suggestions for buying supplies. Have a good day! Mizz Mac

For lessons online Mizz Mac is on Facebook and has her own blog, www.artforkidsonline.blogspot, and website, www.artforkidsonline.com.  


www.teacherspayteachers.com/store/Gena-Mcwilliams160 × 200

Thursday, August 14, 2014

Teachers pay teachers

Shhhh! A surprise is happening on Teachers pay Teachers on August 20!

Wednesday, August 6, 2014

Sales over and I'm having fun!

Ok the TPT sale is over but I am still having fun. Do you like my new background for the blog? I drew the little girl myself and made her into a pattern. I didn't know I could customize the background with my own work!! That was fun! My classes have started back and my students are eager to be back creating wonderful works of art. I hope to get some photographs of their work for you to see soon. Mizz Mac
My Jungle Animal Coloring Book is still a freebie - you might want to grab it while it is!

Monday, August 4, 2014

Tuesday, July 29, 2014

Another Back to School Freebie

I have been trying to think about what teachers my need from an art teacher. I was reminiscing about how I had my room organized with everything my students did in my classroom was about art or art appreciation or art history. One of the favorite activities my early finishers enjoyed were the word search puzzles ( they were all art terms or artists in history) and my coloring sheets. I was inspired to create a coloring book about jungle animals. The book contains 10 sheets of simple black and white line drawings of cartoon-like jungle animals- all my creations and hand- drawn by me! Here is the link:
http://www.teacherspayteachers.com/Product/Mizz-Macs-Jungle-Animal-Coloring-Book-1355615

I hope you all enjoy them. Comments are appreciated. Mizz Mac

Saturday, July 26, 2014

TPT and Back to School

TPT has taken down the freebie page I wrote about in the last posting. I have been working hard to rework some of my back to school ice breakers. I have added photographs of examples and have kept the prices at $1.50. Here are some of them with links:http://www.teacherspayteachers.com/Product/Drawing-with-Beginners-398360


Wednesday, July 23, 2014

Back to School Art Freebie

I have been working hard to make over some of my products and have created a new freebie. I hope you will like it and down load it. Be aware if you download it, TPT has developed a new Freebie page which will show you other products from other sellers that you might be interested in. This is similar to what Amazon does.  Thank you, Mizz Mac
http://www.teacherspayteachers.com/Product/Back-to-School-Ice-Breaking-with-Line-Designs-1339838


Wednesday, July 16, 2014

Sunshine, Sunflowers, and Vincent van Gogh for back to school


When I was driving down the Golden Isle parkway this summer on my way to Saint Simons Island, I saw a field full of beautiful sunflowers. I also saw on Facebook a posting about a beautiful field of sunflowers in Bolingbroke. These two sightings inspired my compilation of four art lessons based on Vincent van When I was driving down the Golden Isle parkway this summer on my way to Saint Simons Island, I saw a field full of beautiful sunflowers. I also saw on Facebook a posting about a beautiful field of sunflowers in Bolingbroke. These two sightings inspired my compilation of four art lessons based on Vincent van Gogh’s Sunflower painting. Here is a portion of one of the lessons:
      Look at your sunflower. What would you draw first? A Circle for the center? What would you draw next? Ovals for petals?
      Draw a minimum of 5 flowers on your paper with a pencil.
      Color brightly with crayons or oil pastels. No white spots of paper can show on the flowers!
      Outline the flowers with black oil pastel or crayon.
      Paint the white background of your paper with light colors of watercolor.


You can find the whole package of lessons including an introduction to Vincent bio page, photographic examples, and a simple art assessment in my store at:

Wednesday, July 9, 2014

Mizz Mac's tips for buying art easels for children's art

Mizz Mac is back with a few tips for parents or grandparents about buying art easels for children. The first easel we bought for our grandchildren was plastic with a white marker board on one wide and dry chalk board on the other. The drawing surfaces were quite small and tray underneath wasn't designed to hold much. There was only a plastic clip to hold one sheet of paper. This easel was fine when my granddaughter took up painting but when my grandson decided it was time for him to start drawing, they couldn't draw on one side and paint on the other without getting frustrated. We decided to buy another easel. We bought two instead. The easels are taller and have adjustable height. One side has a dry erase white board and the other side is dry chalk board. The surfaces are larger and the easels are angled a bit with a nice tray to hold art supplies. The dry erase surfaces are erasable with paper towels. Crayola has dry erase markers and dry erase crayons and large crayon shaped colored chalk on the market. I personally saw these products at Kmart.
By the way, having two easels for two artists is working out great! They are both drawing quite well and are not getting frustrated with each other. 

Here is a picture of my grandson’s drawing: 
(he is in a rocket ship blasting off to the moon!)

Saturday, June 28, 2014

Peachy Watercolors or how to make a peach color

How do you make a peachy color when you only have an eight color box of watercolors? Well I heard someone say once that watercolors are the hardest medium to conquer but it’s not really that hard. When we paint with transparent watercolors (and that is what is in our standard 8 color box), we watch the amount of water we use to make the paint liquid. Controlling the amount of water we use is one step towards mastering this medium. Also, we keep in mind that we have no white color in transparent watercolor. Our water is our “white” color. We need to keep our water clean.
To make a peachy color from watercolor you will need an eight color box of watercolors, watercolor paper- 140 lb. cold press, 1 round soft watercolor brush (I like to use a #10 Crayola), a container with water, and paper towels and a sponge.
First dampen your paper with water, using your sponge. Don’t use too much. Just wet it enough to glisten.
Always begin to paint with your lightest color. Put some yellow paint on your brush and dab some yellow on your damp paper.

Wash your brush out in the container of water. Dry it on the paper towel.
Next get a little orange paint. Dab and mix it in with the yellow on your paper. Wash and dry your brush.

Get a tiny bit of red paint, dab, and mix it in with the yellow orange on your paper. Wash and dry.

This next step is the hard part. Get a teensy weensy bit of blue paint and mix it in the yellow, orange, red paint mix.

Voila! Peach color!
Now you can paint a watercolor landscape of a peach orchard or a basketful of ripe Georgia peaches!

Have fun with your watercolors! Mizz Mac

Thursday, June 19, 2014

A Georgia Peachy Blog

The peaches are flowing in Middle Georgia! Our peach farms are packing their products to ship out! Did you know the Peach Festival cooked the world's largest peach cobbler this past weekend? Here is my grandmother's favorite recipe: 


Now all good Southern cooks are dump cooks which means we use approximately the right amount of ingredients and then change things as we see fit. My grandmother cooked with a gas stove that had no temperature control so check on the cobbler after 30 minutes cooking time! And don't forget to add a dollop of vanilla ice cream! 


Here's another Peachy tidbit- have you heard of the Eat A Peach album by the Allman Brothers? The Allman Brothers were brought to Macon, Georgia in the early 70's by their manager, Phil Walden of Capricorn Records. (Phil was my cousin's high school sweetheart and loved pulling my pigtails!) Before they got big and famous, the Allman Brothers would jam on Sunday afternoons in Central City Park. Wonderful Peachy Music!!

 Grab up your own basketful  of  Peachy free items from our blogs and enter our giveaway!


a Rafflecopter giveaway
a Rafflecopter giveaway a Rafflecopter giveaway


Monday, June 9, 2014

Watercolors/spill free paint for children's art projects

Last week I bought my grandchildren a “new to me” watercolor painting product that advertised no spills, no water needed, etc. The water is in the brush! So I bought one to try out with my 4 year old granddaughter. She loved it at first until she mixed all the colors in the yellow and forgot to clean the brush on the cleaning pad. This led to extreme frustration on her part. So I cleaned the cleaning pad and washed out the yellow.  The brushes look like markers which may have confused her. She is used to painting with a real brush and dipping said brush into a cup of water to change colors. So this grandma/ art teacher gets her granddaughter a cup of water, and all frustration is gone.  Here is what she painted: a dragon that roars!!


My advice is if you buy one of these products and your child/student/grandchild is used to painting with a real brush and uses the dip-in-water-dry-the-brush-on sponge/paper towels-dip-in-paint painting technique, save yourself from a headache and a frustrated child and give the child a cup of water!! Mizz Mac

Monday, May 26, 2014

Under the Sea! Art to do at the beach!

Are you going to the beach this summer? I have just posted a fun art project to do while at the beach on a rainy afternoon or inside cooling off from a day in the sun! Maybe you are going to have a Welcome Back to School Beach theme or maybe you are looking for an art project to enrich a science lesson. This art project is fun for all ages and uses basic classroom/at home art supplies.http://www.teacherspayteachers.com/Product/Under-the-Sea-an-Easy-Artsy-crayon-relief-art-project-1254600


I hope you all will have fun with this art project! Mizz Mac
More of Mizz Mac's lessons can be also be found on her website, www.artforkidsonline.com and on
www.makeitworkmolly.com. Mizz Mac can be found teaching children's art at Creative Alternative in Macon, Ga. 


Friday, May 16, 2014

Watercolor Animals- an Easy Artsy art project for children

Hey Y’all! Mizz Mac here! My latest posting on teachers pay teachers is Watercolor Animals-an Easy Artsy lesson for beginners. I know some of you get frustrated with watercolor painting. It is really an easy medium to use in the classroom. I have made a few suggestions on my supply list pagethat may help you create a successful product.  These animals are adorable displayed on the board or clipped on the wires on your classroom wall.  By the way, this project could also be created by using food coloring or liquid watercolors dropped with eyedroppers on wet paper. Be aware, though, food coloring and liquid watercolors can stain clothing. I am not suggesting the use of those media because of the staining issue.  Here is the link:

An example of finished product!

Thursday, May 8, 2014

TPT SALE EXTENDED!!

Teachers Pay Teachers Sale has been extended one more day! Here's the link to my store's sale:
www.teacherspayteachers.com/store/Gena-Mcwilliams

Saturday, May 3, 2014

TPT is having a Teacher Appreciation Sale!


Our dates are Tuesday and Wednesday May 6 and 7 and my store sale begins on Sunday. My store is 20% off. Mizz Mac

Monday, April 28, 2014

Let's Draw Faces!

Children love to draw cartoons, but to draw a good one one must draw realistically first. the following is one of Mizz Mac's Easy Artsy Lessons for Beginners:
Supplies needed:
a hand held mirror
White paper
Pencil, eraser
A variety of crayons, markers, or colored pencils
1. First draw a small dot in the middle of your paper. Look in the mirror at the eyes. The dark circle is the pupil. The colored part is the iris. Look at the shape of the eye. It’s a football or almond shape. Draw a football shape on one side of the dot. Draw another football shape on the other side of the dot.
2. Look in the mirror again. What covers the eyes? There are upper and lower eye lids. Draw curved lines for the top and lower eyelids.
3. Look at the iris. Is it a whole circle? No. The upper part of the circle isn’t seen. Draw irises in each. Also look at the pupil. You can see the while black circle. Draw the pupils in each eye.
4. Add short lines on the eyelids for the eyelashes. Draw curved lines above the eyes for eyebrows.
5. Draw a nose in between the eyes and a little below the eyes.
6. Draw a mouth by first drawing the shadow line of the closed lips. Then draw curvy lines for the top lip and one curve line for the bottom lip. See below for examples of mouths. Manly man lips are sometimes thin. Girly girl lips are sometimes curvy.
7. Draw “(“ and “)” on the outer sides of the eyes for ears.
8. Draw the jawline beginning at the bottom of one ear, curve around and below the mouth and back up to the bottom of the next ear. See below for examples of jawlines.
9. Finish the drawing by adding straight and curvy lines for the hair at the top of the head. Draw curvy lines for the neck. Manly man necks are thicker and straighter than girly girl ones. Add shoulders and shirt lines.
Example:

For more check out my Drawing Faces with Beginners or Mona Lisa Self Portraits drawing project on teachers pay teachers. www.teacherspayteachers.com/store/Gena_Mcwilliams

Sunday, April 20, 2014

Spring, Children's Art Projects and Landscapes galore!

We have had the craziest weather! Easter was late this year and I expected to have warm weather here in Middle Georgia. Was it?? No! It rained all day yesterday and this morning it was miserable and cool. the sun finally came around 11 just in time for church services. It was still cool this afternoon but great weather to play a little t-ball with my grand son!!
 I still want to go outside to make art just like the plein aire artists of the mid 1800"s. I have compiled a group of my favorite landscape lessons I have used with my classes and posted it on my store on Teacherspay teachers. I have used some for Mother's Day presents for my students.www.teacherspayteachers.com/Product/Easy-Artsy-Landscapes-Earth-day-and-Mothers-Day-Art-Projects-1212604


Monday, April 14, 2014

Flowers in a Vase a Mizz Mac's Easy Artsy Art Project for children

Monet painted “A Bouquet of Sunflowers” in 1881. Van Gogh painted his famous “A Vase with 12 Sunflowers” in 1888. There are many other artists who have painted vases of flowers.  Most of us have placed a vase of flowers on a table in our home.  Let’s try drawing one with colored chalk.  The paper you will need should have a little texture called a tooth in art terms. Construction paper, student grade watercolor paper, and pastel paper have a tooth. Chalk can also be erased with a standard pink eraser. It can be smeared for an impressionistic affect like Monet . Dip chalk in milk or water to make an impasto affect like Van Gogh’s art.
Begin by looking at the middle of the flowers. Draw the middle of the flower. Next add the petals. When you draw the flowers, notice they don’t all face forward. When you are finished drawing the flowers, add the vase. Add the stems and leaves last.
Here is a photograph of one of my flowers in a vase:

Here is an example of a chalk drawing of Flowers in a Vase:


Do you need more ideas? Mizz Mac’s website is www.artforkidsonline.com, and she is on www.teacherspayteachers.com.  Mizz Mac can also be found teaching children’s art classes at the Creative Alternative on Riley Ave in Macon, Ga. 

Wednesday, April 2, 2014

Easter and Overlapping Eggs


Several years ago I had a problem. My principal didn't want any more Easter Eggs hunts or religious oriented art or crafts. What to do?  I was teaching in a private school and most of the children had come up to the elementary school through  the preschool who had Easter Egg Hunts. What did I do? I had kept several oval shaped cardboard inserts from small mats I had used to mat another art project. I took the oval and taught the perspective principle of overlapping shapes to show one in front of the other, making overlapping ovals. We colored with markers and made a variety of line and shape patterns. I never called the lesson "Overlapping Eggs", but if you like the idea, the directions are in the following group of art lessons on my teachers pay teachers store and posted on Make it Work Molly blog.
www.teacherspayteachers.com/Product/Mizz-Macs-Easy-Artsy-Easter-and-Spring-Art-Projects-k-5-577032
www.makeitworkmolly.com

Tuesday, March 25, 2014

Mizz Mac's Easy Shapes Drawing

Shapely Shapes!!

 When we draw, we draw with 5 lines. When we put the lines together, we make shapes. There are two kinds of shapes we can make- geometric or natural.  Using the two kinds of shapes in a work of art creates interest and contrast. A still life is easy to create with household items. For more click on my store:
www.teacherspayteachers.com/Product/Mizz-Macs-Shapely-Shapes-1176835


Monday, March 10, 2014

Youth Art Month Sale!

March is Youth Art Month. Cities across this wonderful land are celebrating with art exhibits of works created by our high school, middle school, and elementary school aged children. I have entered my students in an exhibit for our town's Cherry Blossom Festival. The high schools are exhibiting their artwork in a gallery downtown. To celebrate Youth Art Month I am having a sale  20% off  my whole store on teachers pay teachers on March 14, 15, and 16. Here's the link:
www.teacherspayteachers.com/store/Gena-McWilliams


Friday, March 7, 2014

March winds, Sapelo Island, and Animals Galore

How is the weather where you are? I'm in middle Georgia and the weather has been strange- freezing one minute and warm the next! Yesterday was a cold, rainy day and tomorrow is supposed to be in the 70's!
Last weekend was great weather! I have the privilege of spending one weekend each year with 19 wonderful women on Sapelo Island, Georgia. We laugh and play all weekend and have been doing this for the past 7 years.
    Mizz Mac has posted two new art projects and bundles on her teachers pay teachers store! Mizz Mac's Baby Animal Parade has two lessons based on creating pastel colors:http://www.teacherspayteachers.com/Product/Spring-Baby-Animals-Childrens-Art-Projects-1124304

The other posting is about Mizz Mac's Easy Artsy Jungle Animal Art Projects. The 9 art projects are based on the art of Henri Rousseau, Durer, and the Oxacans. My Animals Pinterest board has the visuals for you to use if you choose to.